Cleaning your Laser Lens can be a tedious job, however, it is incredibly important. In this article i will tell you how to do it quickly so that your Laser can function to the best of its abilities.
Why do you need to clean it often? When should you clean it and how do you clean it? Lets go over the reason "why" first. When particulates, oils and water from your air assist get onto your lens it creates hot spots which can severely damage your lens or change to strength and focal point of your lens. Cleaning it often will help avoid this from happening.
When should you clean it? I clean mine after large production runs (multiple products at one time), after every 5-8 smaller products depending on the material used and i ALWAYS clean it when changing from one medium to another, such as switching from Slate to Wood.
Now to the "how". Below i will outline a step by step guide to help you do it quickly:
- Bring your fence/gantry forward to allow easy access and lower your bed.
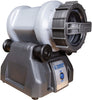
- Unscrew the 2 rings (yours may differ slightly) from the 3rd mirror head assembly and slide the nozzle down until it is released.
- You can leave the air assist attached if you have enough room to work, if not, unscrew the assist to avoid damage.
- Using your Lens Removal Tool of choice, unscrew the inside metal ring to release the compression from the Lens.
- With a paper towel or clean shop towel laid down on the bed, gently pour the lens out of the nozzle assembly onto the clean surface avoiding touching it with your fingers.
- Wipe the lens clean with an electronic wipe (my preferred method, though some people use alcohol) and set down the lens gently on the clean surface. Follow this by wiping off mirror 2 and 3 with the electronic wipe.
- using a piece of the paper towel, pick up the lens and wipe away any excess moisture.
- DO NOT drop your lens into the nozzle unit, it may not seed correctly and could be damaged when you screw the metal ring back in. Instead, turn the nozzle sideways and place the lens inside using the piece of paper towel to ensure it sets correctly. Make sure the higher side of the lens is facing away from the tip of the nozzle and towards mirror 3.
- Tighten the metal ring back into the nozzle with your removal tool, don't over tighten.
- Screw the air assist back on and slide the nozzle back into the laser head assembly and tighten the two rings finger tight to secure it in place.
If you are wanting to switch out the lens from say a 2" to a 4" lens, at step 8 you do this the same way as described. Make sure the new lens is clean before insertion. The only additional step is to use the Tip Removal tool to unscrew the tip and replace it with the correct one.
That's it, you are ready to rock! Total time is about 5 minutes and will save you from damaging your lens and possibly your product. I will provide some Amazon Affiliate links below where you can purchase the items mentioned above!